Understanding How Your Hot Water System Works
Most homes use storage or tankless water heater systems for daily needs like bathing and cleaning. Both types guarantee a steady supply of hot water.
Storage hot water systems use heating elements, powered by electricity or gas, to maintain the water at the desired temperature. Tankless systems rapidly heat water as it flows through the water unit, providing a constant stream of hot water on demand without needing to store any water.
Essential components of most hot water systems include heating elements, thermostats, anodes, and temperature/pressure (T/P) valves, which may occasionally require maintenance such as a drain cleaning. Understanding these components can help to effectively winterize your water system, ensuring it stays in prime condition through the colder months.
Checking and Removing Sediment Buildup
To safeguard efficiency, annually inspect your water heater and remove any sediment buildup inside your system. Over time, mineral deposits and sediment build up at the bottom of the tank, which can lead to reduced system efficiency and potentially premature failure – a scenario best avoided.
Here is a step-by-step guide to checking and removing sediment from your water tank:
- Ensure your water heater is switched off at the circuit breaker and the water supply is ceased to prevent water inflow during maintenance.
- Connect a garden hose to the tank’s drain valve and route it to an area where you can safely drain your tank.
- Check your pressure relief valve at the top of the tank to allow air in and water to drain out through the hose.
- After draining, leave the tank empty and inspect for sediment accumulation inside. Use a flashlight to visually check the bottom of the empty tank.
- If heavy sediment deposits are present, they may need to be physically removed. Wear protective equipment while cleaning out the tank.
- After cleaning, close the drain valve, refill the tank, turn on the cold water supply, and check for any leaks.
- Restore power once tank is full. Allow time for the tank to warm up water to normal operating temperature.
Conducting an annual flush of sediment is a crucial part in winterizing your water heater, ensuring smooth and efficient performance. Prolonged buildup can cause functionality issues, so inspecting and cleaning your hot water unit is vital preventative maintenance.
Inspecting and Replacing the Sacrificial Anode
It’s critical to ensure the sacrificial anode rod within your hot water tank is effective in preventing corrosion. I highly recommend understanding that the anode rod, made of an active metal like aluminium or magnesium, attracts corrosive elements instead of allowing them to eat away at your tank’s metal walls.
Annual checks of the anode rod, and replacements when needed, will preserve and extend your heater’s lifespan. Follow these steps:
- Turn off the power to the water heater and shut off the cold water supply line.
- Drain tank partially by opening the pressure relief valve.
- Unscrew anode rod at the top of the tank to remove it.
- Inspect level of corrosion. Replace if diameter is reduced by 6 millimetres or more.
- Apply thread seal tape to new anode rod and screw fully into place.
- Close relief valve and turn water/power back on. Allow tank to refill and reheat.
Plan to inspect and, if necessary, replace your water heater’s sacrificial anode rod every 3-5 years to prolong its life. Doing so helps prevent corrosion damage, thus helping to prolong the life of your water heater and maintain its effectiveness.
Ensuring Adequate Pipe and Tank Insulation
Insulating hot water pipes and the storage tank is crucial to extend your heating system’s life and enhance energy efficiency. Insulation prevents valuable heat loss while water sits in pipes or the tank, saving on energy costs and helping protect your system from inefficiency.
Insulate pipes with adhesive foam and secure seams with duct tape. Encase tanks in an insulation blanket, following the manufacturer’s instructions for fastening.
It’s a good idea to aim for an R-value of at least R-6 for pipes and R-16 for storage tank insulation. The higher the R-value, the better the heat retention. Using adequate insulation thickness not only keeps water hot but can save you from wasted thermal energy.
Install heat traps on pipes to reduce heat loss in idle periods, especially in cold weather. For tanks, consider a heater insulation jacket or insulating the lower part.
Taking these insulation measures will help your water heater during the winter months retain more heat energy, meaning your heating element works less to maintain temperatures. This strategy effectively reduces your energy consumption over winter.
Adjusting the Temperature Setting
When the temperature drops during winter, turn up your water heater’s thermostat to 125-130°F to ensure your shower and other needs are met with ample hot water, given the colder groundwater temperatures entering the system.
While the Department of Energy advises keeping heaters set to 120°F for efficient energy use most of the year, a slightly higher winter setting helps ensure incoming water is adequately heated.
Utilise these tips to ensure your water heater’s temperature setting is adequately adjusted for the winter season:
- Locate the thermostat dial or controls on your electric or gas heater. There may be a protective panel to unscrew first.
- Test the current output temperature using a thermometer in a mug of water from the nearest faucet.
- Turn the thermostat 5-10 degrees higher if below the 125-130°F target range.
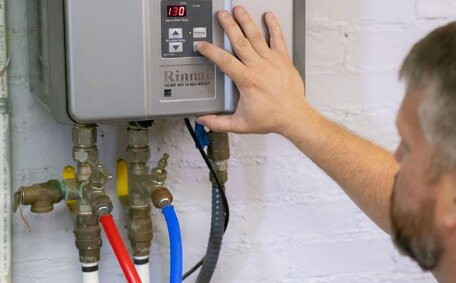
- For tankless heaters, it’s wise to consult your instruction manual for the steps to get your hot water system ready for winterizing, such as descaling and flushing, to maintain optimal performance.
Set your water temperature between 50-55°C to avoid lukewarm output during extreme cold, which also saves on energy costs. However, ensure it’s not too high to prevent scalding and avoid wasting energy.
Testing Pressure Release Valves
Pressure relief valves, also known as TPR valves, are vital for hot water tank safety, automatically opening to release excess pressure and prevent potential explosions.
Periodically test your TPR valve to ensure it’s functioning correctly with the following steps:
- Locate the TPR valve on your hot water tank. It will have a lever and discharge pipe leading away from the tank.
- Lift the test lever slightly to initiate a small water release through the discharge pipe.
- Check that water flows freely from the pipe, indicating the passage and valve are clear of obstructions.
- Release the lever to stop the water flow when satisfied it’s operating correctly.
Annual testing will take care of certifying that your TPR valve can safely relieve dangerous pressure buildup. A functioning valve prevents catastrophic tank failures from excess temperature or pressure.
If there’s no water flowing from the pipe during the test, or it only trickles out, contact your plumber immediately to fix your faulty TPR valve.
Descaling Tankless Water Heaters
Tankless water heaters require special maintenance to remove mineral buildup that accumulates over time. This descaling procedure is especially important before winter, when heavier usage and colder inlet water temperatures make tankless heaters work harder.
Follow these steps to descale your tankless water heater:
- Switch off the power to the water heater and close the cold water inlet valve.
- Connect descaling pump kit and run descaling solution through the system as outlined in manufacturer instructions.
- Remove tankless cover and inspect interior components. Gently scrub any stubborn mineral deposits with a soft brush.
- Thoroughly rinse descaling solution out by running fresh water through the heat exchanger and pipes.
- Reattach covers and restore power and water supply. Allow unit to heat up and test water temperature at taps.
Regular descaling of your tankless heater removes limescale, maintaining optimal functionality amidst increased winter demand. Preventing mineral deposits keeps your system running efficiently.
Winterizing Different System Types
The proper winterization steps can take various forms depending on your hot water system type. Here is an overview of key considerations for winterizing common system types:
Solar Hot Water Systems
- Drain the solar collectors and exposed pipes to prevent freezing damage if temperatures drop below zero degrees Celsius.
- Insulate any exposed pipes or collectors that cannot be drained.
- Check glycol levels in the solar loop and refill if low.
Electric Storage Tank Water Heaters
- Insulate the water storage tank with a blanket insulation rated R-16 or higher, especially if your system includes solar panels.
- Insulate connecting pipes to retain heat.
- Set thermostat to 125-130°F to account for colder inlet water.
Gas Storage Tank Water Heaters
- Insulate tank and pipes as you would for an electric system.
- Have a technician service the unit before winter, including checking exhaust venting.
Tankless Water Heaters
- Descaling tankless heaters can restore lost efficiency from mineral deposits.
- Consult manual for proper winter maintenance like flushing heat exchanger.
- Ensure proper insulation on all water pipes leading to and from the unit.
Customize your winter hot water system maintenance according to your specific type of heater. Prioritise insulation, adjust settings, and perform seasonal servicing as needed to keep your system running reliably all winter.
Practical Tips for Better Winter Performance
Here are some practical tips to prepare your hot heater needs, ensuring optimal performance throughout the colder months:
- Adjust your thermostat on the water heater to achieve your desired 125-130F target, compensating for the colder groundwater temperatures entering the system.
- For tankless systems, descale the heat exchanger and flush inlet pipes to remove mineral buildup that reduces efficiency.
- Periodically test your water heater’s pressure relief valve by lifting the lever to ensure water flow is unobstructed, preventing hazardous pressure buildup.
- Check for sediment accumulation in tanks and flush out if excessive buildup exists.
- Out with the old, in with new hot, efficient models boasting ENERGY STAR certification to cut down on energy costs.
- Insulate any external pipes and drain solar collectors if temperatures drop below freezing.
- Adjust gas appliances and inspect exhaust venting before winter.
- Set sinks to "trickle" mode overnight to prevent frozen pipes.
Proactive insulation, maintenance, and adjustments will keep your water heater functioning optimally throughout winter, despite increased demand and lower temperatures.
Conducting a Winter Readiness Check
Conduct a thorough inspection and maintenance check before winter to prepare your hot water system. This prepares your system for increased demand and harsh weather, helping avoid breakdowns or failures.
Follow this comprehensive winter readiness checklist from the experts at Ashfield Plumbing:
Storage Tank Water Heaters
- Drain and flush sediment from tank interior
- Inspect and replace sacrificial anode rod if worn down
- Insulate hot water storage tank with R-16+ rating blanket
- Insulate connecting pipes to prevent heat loss
- Set thermostat to 125-130°F to account for colder inlet water temps
- Test pressure relief valve by lifting lever to ensure water flows out
- Descaling heat exchanger and pipes to remove mineral deposits
- Consult your plumbing system manual for proper winter maintenance recommendations
- Insulate inlet and outlet pipes
- Check condensate drain pipe is clear of obstructions
Insulate any exposed external pipes and drain storage hot water collectors if risk of freezing overnight temperatures. Adjust gas appliances and inspect exhaust venting.
For comprehensive hot water service, our expert team at Ashfield Plumbing will thoroughly inspect and winterize your system. Contact us for exceptional service to ensure your water heater is prepared for the cooling weather. Email us or call 1300 349 338 for winter maintenance.


